My Virtualisation HomeLab
Here how I set up a virtualized environment at home to be able to easily spawn VMs and try out new tools, or perfect my ansible roles. First thing first, we need some hardware. I bought some years ago a shuttle xpc nano. I made sure to have as much RAM as possible and also attached my old ssd disk.
The hypervisor
I used to run a free ESXi on it, but unfortunately there is not much you can do with the API without vsphere. So at some point I decided to switch to proxmox. The first thing was to go through the installation of proxmox. The installation is straightforward and completed without any issues.
The DNS setup
For the DNS server I used PowerDNS mostly due to the availability of a rest API. Since I use Debian 10 and already had pdns-recursor in place I had to install the server:
$ apt-get install pdns-server pdns-backend-sqlite3Below is part of the /etc/powerdns/pdns.conf where we make sure PowerDNS is available on port 5300. This way we still use pdns-recursor for our DNS requests, but only for the pve.loc we send requests to pdns. Sure .loc is not a good idea but is small and sweet.
# /etc/powerdns/pdns.conf
local-address=127.0.0.1
local-port=5300

master=yes
and the /etc/powerdns/recursor.conf part:
# /etc/powerdns/recursor.conf
forward-zones=pve.loc=127.0.0.1:5300
Also we make sure to enable the api server and make it accessible from our lan:
# /etc/powerdns/pdns.conf
api=yes
api-key=SUPERLONGSECRET

webserver=yes
webserver-address=0.0.0.0
webserver-allow-from=192.168.0.0/24
webserver-port=8081
And create a zone specific to my virtualisation lab
$ sqlite3 /var/lib/powerdns/pdns.sqlite3 < /usr/share/pdns-backend-sqlite3/schema/schema.sqlite3.sql
$ pdnsutil create-zone pve.loc
$ pdnsutil list-zone pve.loc
The IPAM setup
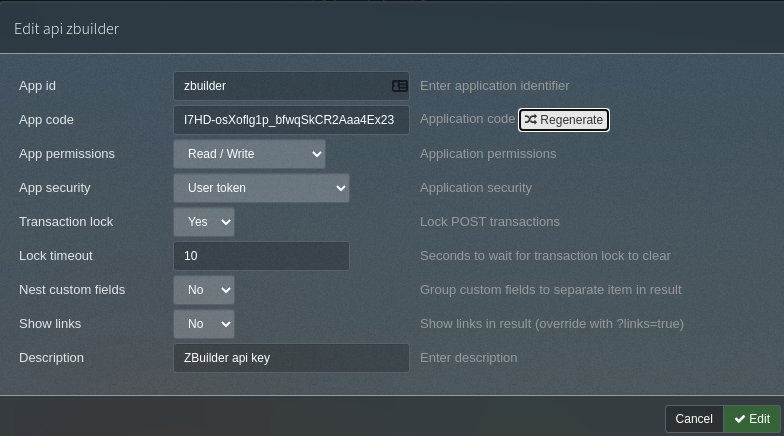
One thing that you might miss when not operating in the cloud, is an easy way to assign IP addresses to your VMs. For this an IP management solution is quite handy. So here is phpIPAM to the rescue. After we install phpIPAM we need to do at least two things. First setup our subnet, and second declare an api user:

Packer to create OS templates
To create VMs easy and fast a VM template is helpful. Thankfully there is a proxmox builder available for packer.
Setup ZBuilder
So now that we have a hypervisor platform with all peripheral services (DNS, IPs, VM templates) all we need is zbuilder to automate the creation of new environments. First we install the tool:
$ pip3 install --user zbuilderAnd then we configure the three providers we have created. Our proxmox server:
$ zbuilder config provider pve-home type=proxmox
$ zbuilder config provider pve-home username=root@pam
$ zbuilder config provider pve-home password=YOURPASSWORD
# My primary home domain is hasiotis.loc (sure .loc is not a good idea!)
$ zbuilder config provider pve-home url=pve.hasiotis.loc:8006
$ zbuilder config provider pve-home ssl=true
# I don't have a valid ssl for proxmox
$ zbuilder config provider pve-home verify=false
Then our dns provider:
$ zbuilder config provider home-pdns type=powerdns
# shuttle is my main home server
$ zbuilder config provider home-pdns url=http://pve.hasiotis.loc:8081/
$ zbuilder config provider home-pdns apikey=SUPERLONGSECRET
# I will be using pve.loc domain for proxmox VMs
$ zbuilder config provider home-pdns.dns zones=pve.loc
Finally the ipam provider:
$ zbuilder config provider home-ipam type=phpipam
$ zbuilder config provider home-ipam server=ipam.hasiotis.loc
$ zbuilder config provider home-ipam username=Admin
$ zbuilder config provider home-ipam password=YOURPASSWORD
$ zbuilder config provider home-ipam ssl=false
$ zbuilder config provider home-ipam verify=false
$ zbuilder config provider home-ipam.ipam subnets=192.168.33.0/24
Now to make sure our config is set, we can check with:
$ zbuilder config view
# ZBuilder configuration
main: {}

providers:
  pve-home:
    type: proxmox
    username: root@pam
    password: YOURPASSWORD
    url: pve.hasiotis.loc:8006
    ssl: true
    verify: false
  home-pdns:
    type: powerdns
    url: http://pdns.hasiotis.dev:8081/
    apikey: SUPERLONGSECRET
    dns:
      zones: pve.loc
  home-ipam:
    type: phpipam
    server: ipam.hasiotis.loc
    username: Admin
    password: YOURPASSWORD
    ssl: false
    verify: false
    ipam:
      subnets: 192.168.33.0/24
So we are now ready to use our setup! On the next post.